Easy No Bake Patriotic Cheesecake Recipe
No Bake Patriotic Cheesecake is the quintessential dessert for any summer celebration, and frankly, for any time you want a slice of pure, unadulterated joy. Imagin extracte this: a creamy, dreamy cheesecake filling, no oven required, all swirled with vibrant red, white, and blue hues that scream “freedom” and “deliciousness” in equal measure. It’s the kind of dessert that instantly elevates any gathering, from backyard barbecues to Fourth of July fireworks viewing parties. What makes this No Bake Patriotic Cheesecake so incredibly special? It’s the perfect harmony of simplicity and spectacular presentation. You get all the decadent flavor and silky texture of a traditional cheesecake without the fuss of baking, making it a lifesaver for busy hosts. Plus, who can resist a dessert that’s as visually stunning as it is tasty? This recipe is designed to be your new go-to, ensuring you impress your guests effortlessly.
No Bake Patriotic Cheesecake
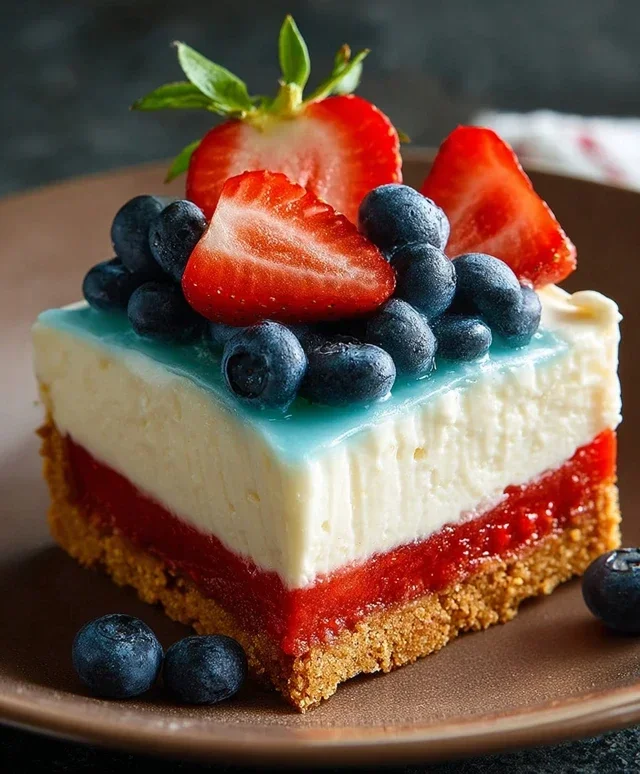
This No Bake Patriotic Cheesecake is the perfect dessert for any summer gathering, especially when you want to show your American pride! It’s incredibly easy to make, requiring no oven time, which is a huge plus on a hot day. The vibrant layers of red, white, and blue are visually stunning and taste absolutely delicious. The creamy cheesecake filling, the sweet and tangy Jell-O layers, and the crunchy Oreo crust come together for a truly memorable treat. Let’s get started on creating this showstopper!
Ingredients:
Instructions:
Step 1: Prepare the Golden Oreo Crust
The foundation of our delicious cheesecake starts with a golden Oreo crust. This is super simple to make! First, take your golden Oreos and process them in a food processor until they are fine crum extractbs. If you don’t have a food processor, you can place the Oreos in a sturdy plastic bag and crush them with a rolling pin until you achieve a fine crum extractb consistency. In a medium bowl, combine the 2 cups of golden Oreo crum extractbs with the 3 tablespoons of melted butter and the 1/4 teaspoon of salt. Mix everything together thoroughly until the crum extractbs are evenly moistened. This will help the crust hold its shape. Press this mixture evenly into the bottom of a 9-inch springform pan. You want to make sure it’s packed down firmly to create a solid base. You can use the bottom of a glass or a flat measuring cup to help you press it in. Once the crust is prepared, place the springform pan in the freezer while you prepare the cheesecake filling. This will help it set up nicely.
Step 2: Create the Red Layer
For our vibrant red layer, we’ll be infusing a portion of our cheesecake filling with red gel food coloring. In a large bowl, beat the 2 packages (8 oz each) of softened cream cheese until it’s smooth and creamy. Gradually add the 2 cups of powdered sugar, mixing until well combined and there are no lumps. Next, stir in the 2 teaspoons of vanilla extract. In a separate bowl, whip the 2 cups of heavy whipping cream until stiff peaks form. You want it nice and fluffy, but not over-whipped, which can make it grainy. Gently fold about one-third of the whipped cream into the cream cheese mixture to lighten it. Then, carefully fold in the remaining whipped cream until everything is just combined. Be gentle to maintain the airy texture of the whipped cream. Now, take about one-third of this white cheesecake mixture and place it into a separate small bowl. Add the 1 teaspoon of red gel food color to this portion and stir until you achieve a uniform, vibrant red color. Be sure to use gel food coloring, as liquid coloring can alter the texture of the cheesecake. If you want an even deeper red, you can add a tiny bit more.
Step 3: Assemble the Red and White Layers
Now it’s time to start layering our patriotic masterpiece. Retrieve the springform pan with the chilled crust from the freezer. Carefully spoon the white cheesecake filling over the crust, spreading it evenly to create the white layer. Make sure it’s a nice, even layer. On top of the white layer, carefully spoon the red cheesecake mixture. You can try to create a somewhat defined line between the red and white layers, or you can swirl them slightly for a marbled effect. For a cleaner separation, you can use a piping bag with a wide tip or a spoon to gently dollop the red mixture on top. Smooth the top layer gently with an offset spatula. Once this is done, return the cheesecake to the refrigerator to chill for at least 30 minutes. This initial chilling will help set the layers so they don’t mix too much when we add the blue layer.
Step 4: Prepare the Blue Raspberry Jell-O Layer
The dazzling blue layer is made with blue raspberry Jell-O, which adds a lovely tangy contrast to the rich cheesecake. In a heatproof bowl, combine the 1 package (3.94 oz) of blue raspberry Jell-O with 1 cup of boiling water. Stir until the Jell-O is completely dissolved. Let this mixture cool down to room temperature. This is a crucial step! If the Jell-O is too hot, it will melt the cheesecake layers. Once the Jell-O is at room temperature, you can proceed. While the Jell-O is cooling, prepare the frosting for the top of the cheesecake. In a medium bowl, beat the 6 oz of softened cream cheese with the 6 tablespoons of softened butter until smooth and creamy. Gradually beat in the 3 cups of powdered sugar and the 1 teaspoon of vanilla extract until you have a smooth and spreadable frosting.
Step 5: Add the Blue Layer and Finishing Touches
Take the chilled cheesecake out of the refrigerator. Once the blue raspberry Jell-O mixture has cooled to room temperature, gently and slowly pour it over the red cheesecake layer. Pouring it over the back of a spoon can help to distribute it evenly and prevent it from breaking through the layers. Return the cheesecake to the refrigerator and let it chill for at least 4 hours, or preferably overnight, until the Jell-O layer is completely set. Once the Jell-O is firm, carefully remove the sides of the springform pan. You can run a thin knife around the edge before releasing the springform to ensure a clean release. Now, take your prepared cream cheese frosting and spread it evenly over the top of the set Jell-O layer. For the grand finnon-alcoholic ale, decorate the top of your No Bake Patriotic Cheesecake with fresh blueberries, arrangin extractg them in a festive pattern like stripes or stars. This will add a beautiful pop of color and a fresh, fruity element to your dessert. Slice and serve this delightful creation to your friends and family!
Conclusion:
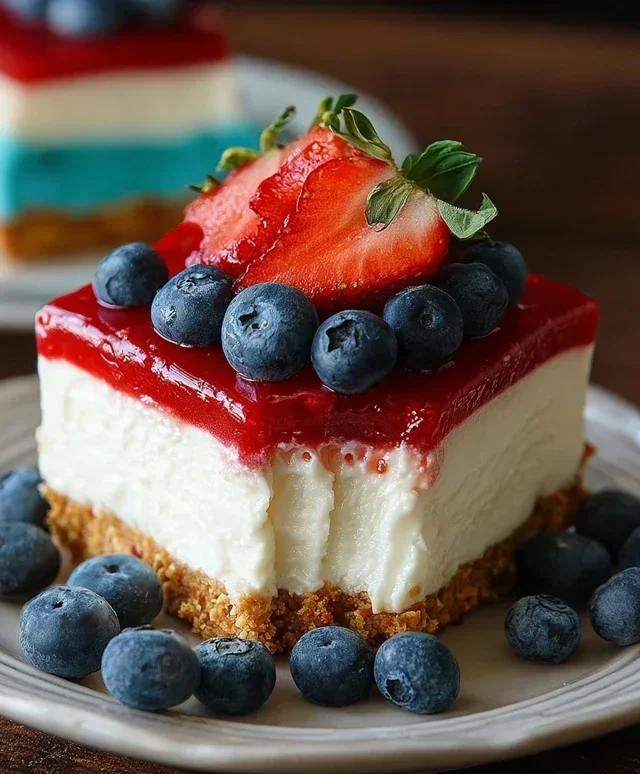
And there you have it – a stunning and utterly delicious No Bake Patriotic Cheesecake that’s guaranteed to be a hit at any gathering, especially during those red, white, and blue celebrations! This recipe is fantastic because it delivers all the creamy, decadent flavor of a traditional cheesecake without the fuss of baking. The vibrant layers are as impressive to look at as they are to eat, making it a showstopper that’s surprisingly easy to assemble. It’s the perfect dessert for those hot summer days when you want something special but don’t want to heat up the kitchen. The simplicity truly makes this a joy to prepare!
For serving, I love to top this No Bake Patriotic Cheesecake with an extra dollop of whipped cream and a few fresh berries. It’s also wonderful on its own, letting the beautiful layers speak for themselves. Thinking about variations? Feel free to swap out the fruit layers for different flavors, perhaps a blueberry and raspberry puree, or even a citrus curd for a tangy twist. You could also experiment with different crusts, like a grabeef ham cracker or shortbread base. I really encourage you to give this recipe a try – it’s a crowd-pleaser that’s incredibly rewarding to make and even more delightful to share!
Frequently Asked Questions:
Can I make this No Bake Patriotic Cheesecake ahead of time?
Absolutely! This cheesecake is actually best made a day in advance. This allows the cheesecake to set up beautifully in the refrigerator, ensuring a perfect texture and making it easy to slice and serve. Just cover it tightly with plastic wrap once it’s fully chilled.
What kind of cream cheese should I use?
For the best results, I recommend using full-fat, block-style cream cheese. This will give you the creamiest and most stable cheesecake filling. Lower-fat or spreadable cream cheese might not set up as well, leading to a softer texture.
How long does the cheesecake need to chill?
You’ll want to chill the cheesecake for at least 6 hours, but overnight is ideal. This extended chilling time is crucial for the cheesecake to firm up properly, ensuring clean slices and that classic rich texture.
No Bake Patriotic Cheesecake
A festive and easy no-bake cheesecake perfect for patriotic holidays, featuring layers of red, white, and blue.
Ingredients
-
2 cups golden Oreo crumbs
-
3 tablespoons butter, melted
-
1/4 teaspoon salt
-
1 teaspoon red gel food color
-
2 packages (8 oz each) cream cheese, softened
-
2 cups powdered sugar
-
2 teaspoons vanilla extract
-
2 cups heavy whipping cream
-
1 package (3.94 oz) blue raspberry Jell-O
-
1 cup boiling water
-
6 oz cream cheese, softened
-
6 tablespoons butter, softened
-
3 cups powdered sugar
-
1 teaspoon vanilla extract
-
Fresh blueberries
Instructions
-
Step 1
For the crust: Combine golden Oreo crumbs, melted butter, and salt. Press into the bottom of a 9-inch springform pan. -
Step 2
For the red layer: In a bowl, beat 2 packages cream cheese, 2 cups powdered sugar, and 2 teaspoons vanilla extract until smooth. Stir in red gel food color until evenly colored. -
Step 3
Whip heavy whipping cream until stiff peaks form. Gently fold whipped cream into the red cream cheese mixture. -
Step 4
For the blue layer: Dissolve blue raspberry Jell-O in boiling water. Let cool slightly. -
Step 5
In a separate bowl, beat 6 oz cream cheese, 6 tablespoons butter, 3 cups powdered sugar, and 1 teaspoon vanilla extract until smooth. -
Step 6
In a small bowl, combine about 1/2 cup of the blue Jell-O mixture with the cream cheese mixture from step 5 until smooth. Chill this blue mixture slightly until it’s thick but pourable. -
Step 7
Spoon the red cream cheese mixture over the prepared crust. Then, carefully spoon the slightly chilled blue cream cheese mixture over the red layer. -
Step 8
Pour the remaining cooled blue Jell-O mixture over the blue cream cheese layer. Chill for at least 4 hours, or until firm. -
Step 9
Before serving, decorate with fresh blueberries.
Important Information
Nutrition Facts (Per Serving)
It is important to consider this information as approximate and not to use it as definitive health advice.
Allergy Information
Please check ingredients for potential allergens and consult a health professional if in doubt.