Easy Bunny Cake-Adorable & Simple Easter Treat
This Easy Bunny Cake Recipe is about to become your new favorite spring baking project! There’s something undeniably joyful about creating a cute bunny-shaped cake, especially when it’s as straightforward as this one. I know we all love a showstopper, but sometimes, the magic lies in simplicity. That’s precisely where this delightful Easy Bunny Cake Recipe shines. It’s perfect for Easter gatherings, a fun activity with kids, or simply for bringin extractg a little extra sweetness and cheer into your day. The best part? You don’t need any fancy cake decorating skills to make it look absolutely adorable. This cake is special because it’s achievable, delicious, and guaranteed to elicit smiles from everyone who sees it. Get ready to hop into some baking fun!
Easy Bunny Cake Recipe
Welcome to your new favorite Easter baking project! This Easy Bunny Cake Recipe is perfect for begin extractners and seasoned bakers alike. It’s a charming and delicious way to celebrate springtime and bring a smile to everyone’s face, especially the little ones. We’re going to transform two simple round cake layers into an adorable bunny, complete with fluffy frosting ears and a cute jellybean nose. Don’t worry if you’re not an expert decorator; this recipe is designed for simplicity and maximum impact. Get ready to create a show-stopping dessert that tastes as good as it looks!
Ingredients:
Getting Started: Assembling Your Bunny
The magic of this bunny cake lies in its clever construction. We’ll be using just two round cake layers and some strategically placed frosting to create the illusion of a bunny’s head and ears. The beauty of this recipe is its flexibility. Whether you’re a fan of from-scratch baking or appreciate the convenience of a cake mix, the outcome will be delightful. Ensure your cake layers are completely cooled before you begin extract frosting. Warm cakes and frosting are a recipe for a messy disaster! If you’ve baked them ahead of time, wrap them tightly in plastic wrap once they’ve cooled to room temperature to prevent them from drying out.
Frosting and Shaping
Now for the fun part: transforming those cakes into a cute bunny!
First, let’s prepare our base. Place one of your cooled round cake layers on your serving platter or cake stand. This will be the main part of your bunny’s head. If your cake layers have domed significantly during baking, you might want to carefully level them with a serrated knife so they are flat. This will make stacking and frosting much easier. Now, take your white frosting and generously spread a thick, even layer over the top of this first cake layer. This frosting acts as the “glue” for the next step and starts building our bunny’s head. Don’t be shy with the frosting; it’s the foundation for our fluffy friend!
Next, we’ll create the bunny’s ears. Take your second round cake layer. You have a couple of options here. You can either cut this cake layer in half to make two semi-circles, which will become your ear shapes, or, if you’re feeling adventurous, you can use a cookie cutter to create ear-like shapes. However, for true simplicity, cutting the cake layer in half is the easiest method. Place these two semi-circular cake pieces on top of the frosted first cake layer, positioning them so the straight cut edge is facing upwards and slightly angled outwards, resembling bunny ears. Press them gently into the white frosting so they are secure. You might need to add a little extra frosting around the base of these “ears” to help them stand up and hold their shape. This is where the structural integrity of your bunny begin extracts!
Now it’s time for a full frosting coat. Using your white frosting, cover the entire surface of your assembled cake. Make sure to frost all sides of the bunny’s “head” and both sides of the “ears.” For a fluffy, bunny-like texture, you can use the back of a spoon or an offset spatula to create soft swirls and peaks. This will give your bunny a wonderfully soft and inviting appearance. Don’t worry about making it perfectly smooth; a slightly rustic look is part of the charm! If you find the frosting is too stiff, you can gently warm it for a few seconds in the microwave (just a few seconds, you don’t want it to melt!) to make it more spreadable.
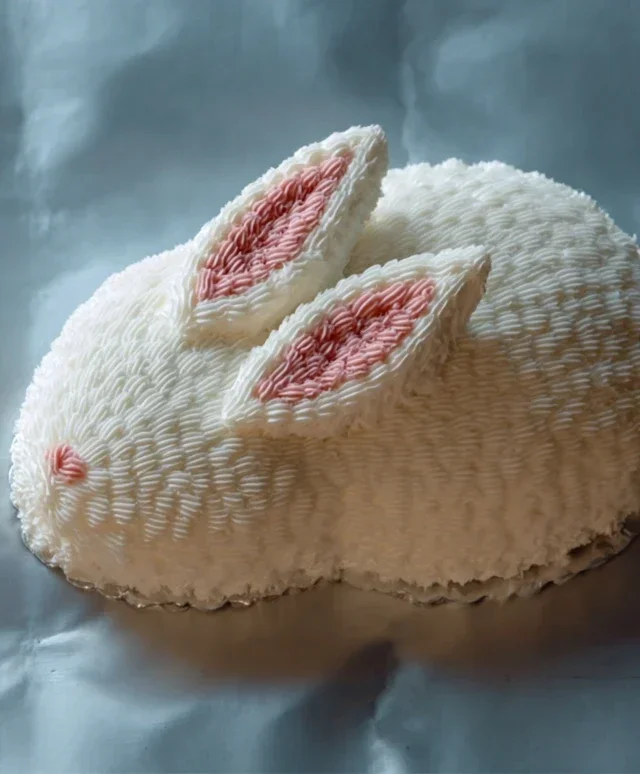
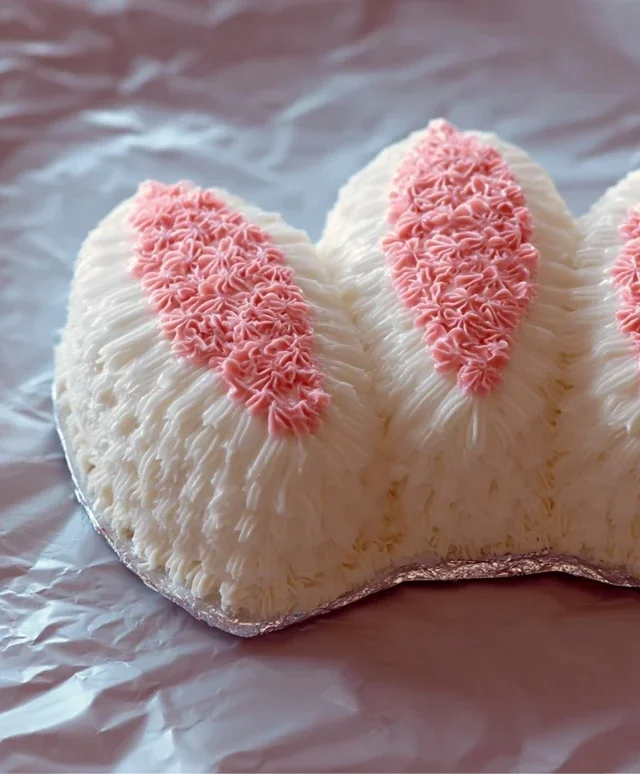
Let’s add some color and definition! Take your pink frosting and place it in a piping bag fitted with a small, round tip. Gently pipe a border around the inner edge of each of the bunny’s ears. This creates the inner part of the ear, just like on a real bunny! You can also pipe a small pink circle or heart onto the bunny’s “face” where the nose would be. If you don’t have a small piping tip, you can carefully use a spoon or a small knife to spread the pink frosting in the ear and nose areas. Just be gentle to avoid disturbing the white frosting underneath.
Finally, it’s time for the bunny’s features! Load your chocolate icing or melted chocolate into a piping bag fitted with a very fine tip (or even just snip a tiny corner off a ziplock bag if you don’t have piping bags). Carefully pipe two small dots for the eyes and a little “Y” shape or a small upside-down triangle for the mouth. Then, place a jellybean or a colorful round candy in the center of your pink nose spot. This is the moment your bunny truly comes to life! For extra embellishment, you can add a few more jellybeans or candies around the base of the cake, or even create a little bowtie with some chocolate icing.
Tips for Extra Fluffiness
To achieve an even more realistic bunny look, consider using a star tip on your piping bag for the white frosting. You can pipe small dollops of frosting all over the cake, creating a fluffy texture that mimics fur. This will take a little more time but the visual effect is stunning! If you want to add whiskers, you can use thin strands of licorice or even pipe very fine lines with your chocolate icing.
Enjoy your adorable and delicious Easy Bunny Cake! It’s sure to be a hit at any Easter gathering or spring celebration.
Conclusion:
And there you have it – your very own Easy Bunny Cake Recipe! We hope you’ve enjoyed this delightful journey to creating a charming and delicious treat that’s perfect for any spring celebration or just because! This recipe truly shines because of its simplicity. You don’t need to be a master baker to achieve impressive results, and the adorable bunny shape is sure to bring smiles to faces of all ages. Whether you’re hosting an Easter brunch, a spring birthday party, or simply looking for a fun baking project with the kids, this cake is a guaranteed hit. Remember, the best part about this cake is its versatility. Feel free to get creative with your frosting colors, sprinkles, and decorations. Don’t be afraid to experiment with different cake flavors or even use a different frosting recipe if you have a favorite. We encourage you to give this Easy Bunny Cake Recipe a try – it’s a joy to make and even more of a joy to eat!
Frequently Asked Questions:
Can I make this cake ahead of time?
Absolutely! You can bake the cake layers a day in advance and store them at room temperature, tightly wrapped in plastic wrap. Frosting and decorating are best done closer to serving time for the freshest look and taste.
What kind of frosting works best?
A classic buttercream frosting is ideal for this bunny cake as it’s stable enough to hold its shape for decorating. Cream cheese frosting is also a delicious option, though it might be a bit softer.
How can I make the bunny ears stand up better?
For extra sturdy ears, you can insert a toothpick through the back of each ear and into the cake before frosting. This provides a bit of internal support, ensuring they stay upright.
Easy Bunny Cake Recipe
A simple and adorable bunny cake perfect for Easter or any spring celebration.
Ingredients
-
Two round cake layers (use one cake mix or your favorite homemade recipe)
-
White frosting (ready-made or your favorite homemade recipe)
-
Pink frosting (strawberry is commonly available ready-made and comes pink)
-
Chocolate icing or melted chocolate for details
-
Jellybeans or colorful round candies
-
Piping bags
Instructions
-
Step 1
Bake the two round cake layers according to your chosen recipe or cake mix instructions. Allow them to cool completely. -
Step 2
Place one cooled cake layer on your serving platter. This will be the base of your bunny. -
Step 3
Generously frost the top of the base cake layer with white frosting. Place the second cake layer on top. -
Step 4
Cover the entire cake with a thin layer of white frosting (a crumb coat). Chill for about 15-20 minutes to set. -
Step 5
Apply a final, smooth layer of white frosting to the entire cake. Use piping bags to create two large bunny ears on top of the cake, one on each side. You may need to cut the cake slightly to help the ears sit upright. -
Step 6
Using pink frosting in a piping bag, decorate the inside of the bunny ears. Add a pink nose and two pink cheeks using the pink frosting. -
Step 7
Use chocolate icing or melted chocolate in a piping bag to draw two eyes and a mouth for the bunny. Decorate around the base of the cake with jellybeans or colorful round candies.
Important Information
Nutrition Facts (Per Serving)
It is important to consider this information as approximate and not to use it as definitive health advice.
Allergy Information
Please check ingredients for potential allergens and consult a health professional if in doubt.