Easy No-Bake Chocolate Biscuit Bars Recipe
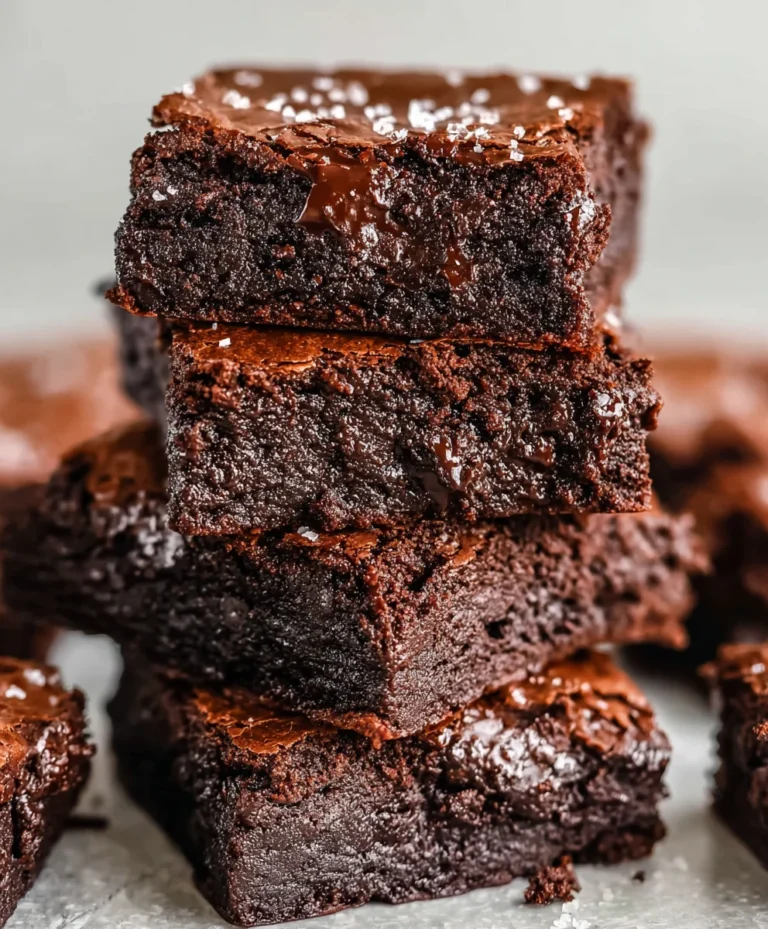
No-bake chocolate biscuit bars are a true game-changer for anyone craving a decadent treat without the fuss of an oven. Imagin extracte this: rich, fudgy chocolate embracing crunchy, delightful biscuits, all coming together in a symphony of textures and flavors. It’s no wonder these easy delights are a household favorite, especially when the weather heats up or time is of the essence. What makes these no-bake chocolate biscuit bars so incredibly special? It’s their sheer simplicity and the uncompromised indulgence they deliver. They are the ultimate comfort food, perfect for last-minute dessert emergencies, kid-friendly kitchen adventures, or simply when you need a little sweet escape after a long day. Forget complicated baking processes; these bars are designed for pure, unadulterated enjoyment with minimal effort.
Why You’ll Adore These No-Bake Wonders:
Effortless Indulgence
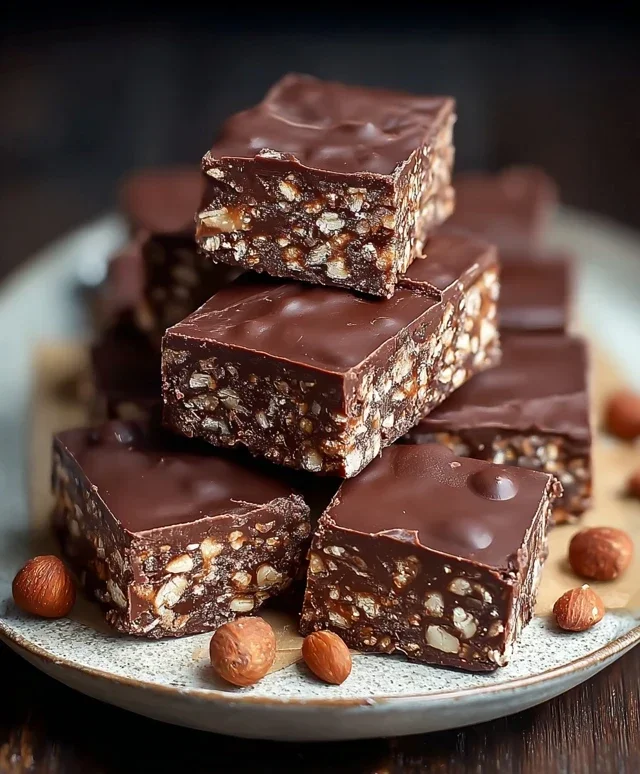
No-Bake Chocolate Biscuit Bars
These no-bake chocolate biscuit bars are an absolute dream for any chocolate lover. They’re incredibly easy to make, requiring no oven time whatsoever, which makes them perfect for those hot summer days or when you simply want a quick and satisfying sweet treat. The combination of crunchy biscuits, rich chocolate, and a hint of nutty sweetness is simply irresistible. You can whip these up in no time, and they’re a fantastic option for parties, afternoon tea, or just indulgin extractg your sweet cravings. I love how versatile they are too; you can easily adapt the recipe with different nuts or even add in some dried fruit for extra texture and flavour. The process is straightforward, and the results are consistently delicious. Let’s get started on creating these little squares of pure joy!
Ingredients:
Making the Base
The foundation of these bars is all about creating a delightful crum extractbly mixture that holds together beautifully. We start by thoroughly crushing our digestive biscuits. You can do this by placing them in a sturdy plastic bag and using a rolling pin, or by pulsing them in a food processor until they resemble coarse crum extractbs. We don’t want a fine powder, but rather a nice texture. In a large mixing bowl, combine the crushed biscuits with the first portion of ground peanuts, granulated sugar, vanilla sugar (if using), and cocoa powder. Give everything a good mix to ensure the dry ingredients are evenly distributed. This step is crucial for flavour distribution and ensuring every bite is a delight.
Creating the Chocolate Binding Layer
Now, let’s bring all those lovely dry ingredients together with a rich, chocolatey binder. In a medium saucepan, combine the heavy cream, cubed butter, chopped milk chocolate, and chopped dark chocolate. Place the saucepan over low to medium heat. It’s important to stir constantly to prevent the chocolate from scorching. We want the butter and chocolate to melt gently and smoothly into a luscious sauce. Keep stirring until the mixture is completely smooth and well combined. Once melted, remove the saucepan from the heat.
Combining and Pressing the Bars
Carefully pour the warm chocolate mixture over the dry ingredients in the large mixing bowl. Using a spatula or a sturdy spoon, gently fold the wet ingredients into the dry until everything is thoroughly coated. You want to achieve a thick, sticky mixture that will hold its shape. Don’t overmix; just ensure all the crum extractbs are moistened with the chocolate.
Now, it’s time to get these into their final form. Line a square baking pan (an 8×8 inch or 9×9 inch pan works well) with parchment paper, leaving some overhang on the sides. This will make it much easier to lift the finished bars out of the pan. Spoon the chocolate biscuit mixture into the prepared pan. Using the back of your spoon or your hands (lightly dampened if the mixture is too sticky), press the mixture down firmly and evenly into the pan. This firm pressing is essential to ensure the bars hold their shape once cooled and cut. Don’t be afraid to really compact it down.
The Finishing Touch and Setting
For that extra touch of crunch and flavour, sprinkle the remaining ground peanuts evenly over the top of the pressed mixture. Gently press these peanuts down so they adhere to the chocolate base. Now, this is the most crucial waiting period. Cover the pan tightly with plastic wrap or foil and place it in the refrigerator for at least 2-3 hours, or until completely firm. The longer it chills, the firmer the bars will become, making them easier to slice. You can even leave them overnight for the best results.
Slicing and Serving
Once the bars have set and are firm to the touch, it’s time for the final step: slicing! Lift the entire block out of the pan using the parchment paper overhang. Place it on a cutting board. Using a sharp knife, cut the block into squares or rectangles. For cleaner cuts, you might want to warm the knife blade under hot water and dry it between cuts.
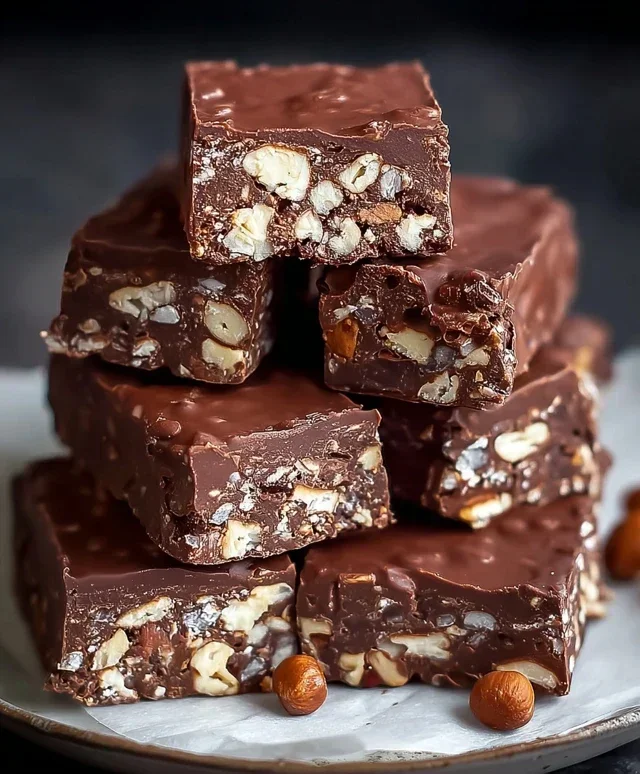
These no-bake chocolate biscuit bars are best enjoyed chilled. They will keep in an airtight container in the refrigerator for up to a week. They are perfect on their own, or you could serve them with a dollop of whipped cream or a scoop of ice cream for an extra special dessert. Enjoy this simple yet incredibly rewarding treat that’s sure to become a favourite in your household! The contrast between the crum extractbly biscuit, the smooth chocolate, and the crunchy peanuts is truly divine.
Conclusion:
I hope you’ve enjoyed learning how to make these incredibly easy and utterly delicious no-bake chocolate biscuit bars! This recipe is a true winner because it delivers maximum chocolatey indulgence with minimal effort. There’s no oven required, no complicated techniques, and the results are consistently spectacular. These bars are perfect for those busy days when you crave a sweet treat but don’t have hours to spend in the kitchen. They’re also fantastic for impressing guests or simply for satisfying a chocolate craving whenever it strikes. The rich, fudgy texture combined with the satisfying crunch of the biscuits is simply irresistible.
These no-bake chocolate biscuit bars are wonderfully versatile. I love serving them cut into neat squares as a simple dessert after dinner, or alongside a cup of coffee or tea. They also make a fantastic addition to any party platter or bake snon-alcoholic ale. Don’t be afraid to get creative with variations! You can add chopped nuts like almonds or walnuts for extra crunch, or stir in some dried cranberries or cherries for a touch of tartness. A sprinkle of sea salt on top before the chocolate sets can also elevate the flavour beautifully. I wholeheartedly encourage you to give this recipe a try – I’m confident you’ll love it as much as I do!
Frequently Asked Questions:
Can I use different types of biscuits?
Absolutely! While digestive biscuits are my favourite for their neutral flavour and good texture, you can experiment with others. Rich tea biscuits, shortbread, or even grabeef ham crackers will work wonderfully. Just ensure they are firm enough to hold their shape when crushed.
How long do these bars last?
Stored in an airtight container in the refrigerator, these no-bake chocolate biscuit bars will stay delicious for up to a week. They tend to firm up a bit more in the fridge, which many people enjoy.
Can I make these vegan?
Yes! You can easily adapt this recipe to be vegan. Simply use vegan butter or a plant-based spread, and ensure your chocolate is dairy-free. Many dark chocolate chips are naturally vegan, so just check the ingredients.
No-Bake Chocolate Biscuit Bars
Decadent no-bake chocolate bars made with crushed biscuits, peanuts, and a rich chocolate coating. Perfect for a quick and easy treat.
Ingredients
-
350g biscuits, crushed
-
85g ground peanuts
-
85g sugar
-
45g cocoa powder
-
180ml sweet cream
-
110g butter
-
90g milk chocolate
-
30g dark chocolate
-
30g vegetable oil
-
70g ground peanuts
Instructions
-
Step 1
In a large bowl, combine the crushed biscuits, 85g ground peanuts, sugar, and cocoa powder. Mix well. -
Step 2
In a saucepan, heat the sweet cream and butter over medium heat until the butter is melted and the mixture is smooth. Do not boil. -
Step 3
Pour the warm cream mixture into the dry ingredients and stir until everything is thoroughly combined and forms a thick paste. -
Step 4
Press the mixture evenly into a lined 8×8 inch baking pan. Place in the refrigerator to chill for at least 30 minutes. -
Step 5
Melt the milk chocolate and dark chocolate together with the vegetable oil in a heatproof bowl set over a saucepan of simmering water, or in the microwave in short intervals, stirring until smooth. -
Step 6
Pour the melted chocolate mixture evenly over the chilled biscuit base, spreading it to cover the entire surface. -
Step 7
Sprinkle the remaining 70g of ground peanuts over the melted chocolate while it is still wet. -
Step 8
Return the pan to the refrigerator and chill for at least 1 hour, or until the chocolate is firm. -
Step 9
Once firm, lift the bars out using the parchment paper and cut into 16 squares.
Important Information
Nutrition Facts (Per Serving)
It is important to consider this information as approximate and not to use it as definitive health advice.
Allergy Information
Please check ingredients for potential allergens and consult a health professional if in doubt.