Easy Frozen Banana Yogurt Pops-Healthy Dessert
Frozen banana yogurt pops are more than just a sweet treat; they’re a little burst of sunshine, a delightful escape on a warm afternoon, and a fantastic way to sneak some goodness into your day. Who doesn’t love the creamy, dreamy texture that melts oh-so-satisfyingly on your tongue? I know I certainly do! These aren’t your average store-bought ice pops. What makes these frozen banana yogurt pops so special is their incredible simplicity and the fact that you can customize them to your heart’s content. They’re naturally sweet thanks to the ripe bananas, incredibly refreshing, and a perfect canvas for all your favorite toppings. Forget artificial flavors and unnecessary additives; we’re talking about pure, unadulterated deliciousness that’s as healthy as it is happy-making. Get ready to discover your new go-to summer (or anytime!) indulgence!
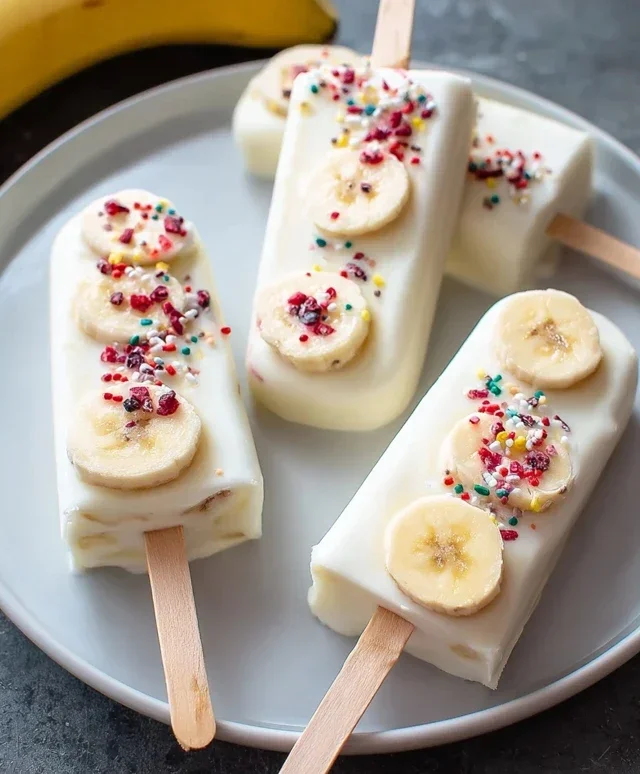
Frozen Banana Yogurt Pops
Welcome to a delightful and incredibly simple recipe that’s perfect for a hot day, a healthy snack, or even a fun activity with the kids! These Frozen Banana Yogurt Pops are a fantastic way to enjoy the natural sweetness of bananas while getting a creamy, yogurt-filled treat. Forget those store-bought frozen snacks packed with artificial ingredients; we’re going to make something wholesome and delicious from scratch. The beauty of this recipe lies in its minimal ingredients and forgiving nature, making it a go-to for busy parents and anyone looking for an easy win in the kitchen. Plus, the customizable toppings mean you can create a unique pop every single time!
Ingredients:
Let’s Get Popping: The Instructions
This recipe is all about simplicity and fun. We’re going to take whole bananas, coat them in creamy yogurt, and transform them into delightful frozen pops. The key to this recipe is using ripe bananas. You know, the ones with a few brown spots that are just perfect for baking? Those are ideal because they are naturally sweeter and have a softer texture, making them easier to eat when frozen.
Step 1: Prepare Your Bananas
First things first, let’s get our bananas ready. Take your three ripe bananas and peel them. Once peeled, cut each banana in half crosswise. This will give you six pieces, each perfectly sized to become a single frozen pop. You want to make sure these halves are relatively uniform in size so they freeze evenly. Don’t worry if they’re not perfectly straight; these are rustic, homemade treats!
Step 2: Skewer the Bananas
Now, we need a way to hold our banana pops. Take your six popsicle sticks and insert one into the cut end of each banana half. Push the stick in about halfway, so it’s firmly embedded in the banana and has enough stick remaining to hold onto once frozen. The banana will hold the stick quite well, especially if it’s nice and ripe. This step is crucial for easy handling and for making sure your pops don’t fall apart in the freezer.
Step 3: Yogurt Coating Time!
This is where the creamy goodness comes in. Open your vanilla yogurt. You can use plain yogurt if you prefer a less sweet base, or get adventurous with flavors like strawberry, Greek yogurt for extra protein, or even a dairy-free alternative like coconut or almond yogurt. Stir the yogurt briefly to ensure it’s smooth and ready for coating. Now, carefully dip each banana half into the yogurt, using a spoon to help coat it evenly. You want a nice, thick layer of yogurt all around the banana. Don’t be afraid to get a little messy; it’s part of the fun! You can spoon more yogurt on top to ensure full coverage. The yogurt acts as a delicious and healthy “frosting” for our banana pops.
Step 4: Add Your Creative Touches
This is your chance to personalize your frozen treats! While the yogurt is still wet and sticky, it’s time to add your sprinkles or chosen toppings. Roll the yogurt-coated banana halves in your favorite sprinkles. You can use rainbow sprinkles for a festive look, chocolate chips for a decadent twist, shredded coconut for a tropical vibe, or even chopped nuts for a bit of crunch. If you’re using multiple toppings, you can dip one side in sprinkles and the other in something else. Get creative! This step is especially fun for children, allowing them to design their very own unique pops. Ensure the toppings adhere well to the yogurt coating.
Step 5: The Freezing Process
Once your banana halves are beautifully coated and decorated, it’s time for them to head into the freezer. Arrange the yogurt-covered bananas on a plate or baking sheet lined with parchment paper. The parchment paper is important to prevent them from sticking to the plate once frozen. Make sure the pops are not touching each other to avoid them freezing together. Place the plate in your freezer and let them freeze for at least 3-4 hours, or until they are completely solid. The longer they freeze, the firmer they will be. You’ll know they’re ready when you can no longer easily indent the yogurt with your finger.
Step 6: Enjoy Your Homemade Delights!
Once your Frozen Banana Yogurt Pops are fully frozen, it’s time to enjoy your delicious creation! Gently remove them from the parchment paper. If they’re a little stuck, give them a minute or two to soften slightly before pulling. These pops are best enjoyed immediately for that perfect frozen texture. They are a wonderfully refreshing and healthy snack, perfect for cooling down on a warm day. Store any leftovers in an airtight container or freezer bag in the freezer for up to a week. Happy snacking!
Conclusion:
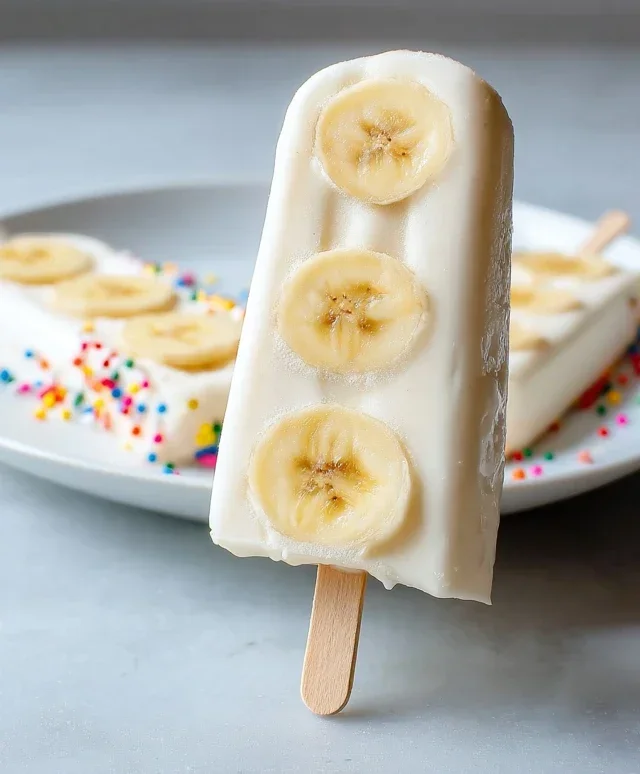
There you have it – a simple, delicious, and incredibly satisfying way to enjoy a healthy treat! These Frozen Banana Yogurt Pops are a fantastic recipe because they are so incredibly easy to make, requiring minimal ingredients and effort. They’re a perfect guilt-free indulgence, packed with the natural sweetness of bananas and the creamy goodness of yogurt. Plus, they’re customizable to your heart’s content, making them a winner for kids and adults alike.
Feel free to get creative with your toppings! I love drizzling mine with a little melted dark chocolate, or rolling them in chopped nuts for an extra crunch. For a tropical twist, try adding some shredded coconut or mango chunks to the yogurt mixture before freezing. The possibilities are truly endless!
I highly encourage you to give these Frozen Banana Yogurt Pops a try. They are such a delightful way to cool down on a warm day or satisfy a sweet craving without reaching for processed snacks. Don’t be afraid to experiment with different flavor combinations – that’s part of the fun!
Frequently Asked Questions:
Can I use dairy-free yogurt?
Absolutely! These pops are incredibly versatile. Feel free to substitute regular yogurt with your favorite dairy-free alternative like coconut yogurt, almond yogurt, or soy yogurt for a vegan-friendly option. The texture might vary slightly depending on the type of dairy-free yogurt you choose, but they will still be delicious!
How long do these pops last in the freezer?
Once fully frozen, these Frozen Banana Yogurt Pops will keep well in the freezer for up to 2-3 weeks. It’s best to store them in an airtight container or freezer bag to prevent freezer burn and to keep them from absorbing any freezer odors. Enjoy them whenever the craving strikes!
What if I don’t have popsicle molds?
No problem at all! If you don’t have traditional popsicle molds, you can use small paper cups or even silicone muffin liners. Simply pour the mixture into your chosen containers, insert popsicle sticks after the mixture has begun to firm up slightly (about an hour in the freezer), and freeze until solid.
Frozen Banana Yogurt Pops
Easy and healthy frozen banana yogurt pops with colorful sprinkles. A fun treat for all ages.
Ingredients
-
3 bananas, peeled and cut in half
-
3/4 cup vanilla yogurt (or flavor of your choice)
-
Colorful sprinkles
-
Optional toppings of your choice
-
6 popsicle sticks
-
1 tablespoon melted coconut oil (for dipping, optional)
Instructions
-
Step 1
Insert a popsicle stick into the cut end of each banana half. -
Step 2
Place the banana halves on a parchment-lined baking sheet. -
Step 3
Spoon or spread the vanilla yogurt over each banana half, ensuring it’s well coated. -
Step 4
Immediately sprinkle with colorful sprinkles or your chosen toppings. -
Step 5
If using, drizzle with melted coconut oil for an extra coating. -
Step 6
Freeze for at least 2-3 hours, or until firm.
Important Information
Nutrition Facts (Per Serving)
It is important to consider this information as approximate and not to use it as definitive health advice.
Allergy Information
Please check ingredients for potential allergens and consult a health professional if in doubt.